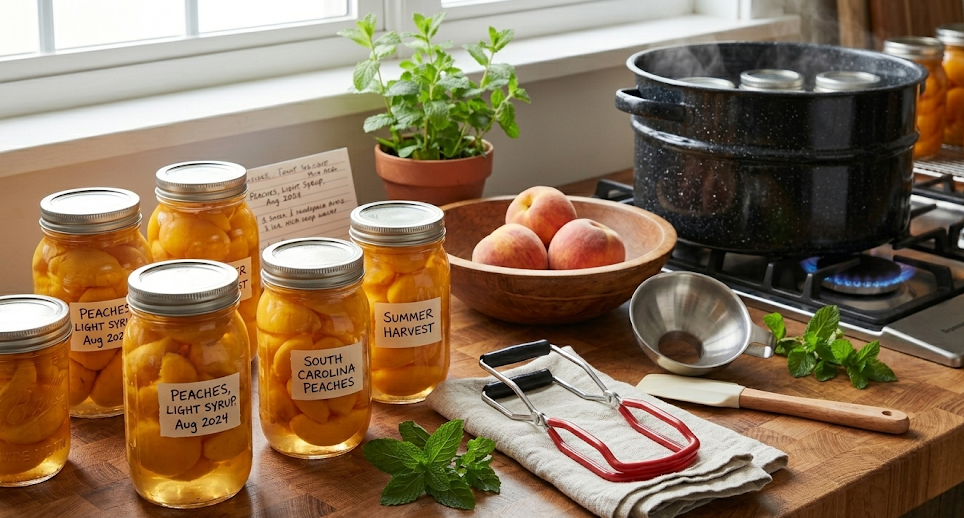
Fresh Jars, Full Hearts – A Beginner’s Guide to Water Bath Canning:
Preserving Your Spring Harvest.
Spring has officially sprung, and if your countertop is currently buried under a mountain of strawberries, blueberries, asparagus and peas, you’ve probably thought: “I wish I could keep this flavor forever.”
Good news! You can. Water bath canning is the perfect entry point for preserving your hard-won harvest. It’s essentially a low-stakes science experiment that ends with a shelf full of “liquid gold.” Let’s get you started on your first batch without the overwhelm.
What is Water Bath Canning?
At its simplest, water bath canning involves processing jars of food in boiling water. The heat kills off microorganisms and creates a vacuum seal that keeps your food shelf-stable for a year or more.
The Golden Rule: High Acid Only
Water bath canning is only for high-acid foods. The acid prevents the growth of dangerous bacteria (like botulism) that can’t be killed by boiling alone.
Safe for Water Bath Canning:
- Fruits (strawberries, peaches)
- Plain Vegetables (carrots, green beans)
- Jams and Jellies
STOP! You Need a Pressure Canner for:
- Meats and Poultry
- Pickles and Relishes
- Seafood
- Salsas (with enough vinegar/lime)
- Soups and Stews
Your “Starter Kit” Checklist
You don’t need a professional kitchen to do this. Most of these items are probably already in your cabinets, or can be found at any local hardware store.
- A Large Pot (Stock Pot): It needs to be deep enough to cover your jars by at least one inch of water, with room for a rolling boil.
- Canning Jars: Use jars specifically made for canning (like Mason, Ball or Kerr). Avoid re-using old pasta sauce jars. The glass isn’t tempered for the heat.
- Two-Piece Lids: You need the flat metal lids (one-time use) and the screw-on rings (reusable).
- Jar Lifter: This is non-negotiable. Trying to fish a slippery glass jar out of boiling water with tongs is a recipe for a disaster.
- Wide-Mouth Funnel: Keeps your jar rims clean (which is vital for a good seal).
The Step-by-Step Process
Don’t let the idea of canning intimidate you. Once you get a rhythm, it can be incredibly satisfying.
1. Prep Your Jars
Wash your jars and lids in hot, soapy water. Rinse thoroughly. Keep the jars warm (in a low oven or the dishwasher) so they don’t crack when you fill them with hot food.
*NOTE: I keep mine submerged in plain, hot water until it’s time to fill them.
2. Pack the Jars
Follow a tested recipe (check the Ball Blue Book [https://www.amazon.com/Ball-Blue-Book-Guide-Preserving/dp/0972753702] or the National Center for Home Food Preservation [https://nchfp.uga.edu/]). Leave the required headspace (that’s the empty gap between the food and the top of the jar).
3. De-bubble and Wipe
Run a plastic spatula or “bubble tool” around the inside of the jar to release trapped air. Use a damp cloth to wipe the rim of the jar perfectly clean. One stray seed or drop of syrup will ruin your seal!
4. The Big Boil
Place your jars into the pot using your jar lifter. Once the water returns to a full, rolling boil, start your timer. Processing times vary by recipe and your altitude. Follow the guidelines for your specific location.
5. The “Ping”
Remove the jars and set them on a towel-lined counter. Do not touch them for 24 hours. As they cool, you’ll hear a metallic ping; the most rewarding sound in your kitchen. It means your seal is successful.
A Quick Safety Reality Check
I know, I know … the internet loves to talk about botulism. While safety is important, it isn’t scary if you follow the rules.
Pro Tip: Always use a tested, modern recipe. The time to test your grandma’s 1950s recipe will come later. Modern produce has different acidity levels, and safety standards have evolved!
Your future self will thank you when you open a jar of April sunshine in the middle of January. Happy canning!